The Ultimate Professional Toilet Seat Installation and Maintenance Guide
Ensuring a perfectly installed and well-maintained toilet seat is crucial for both functionality and hygiene in any commercial or residential setting. This comprehensive guide, brought to you by Jell Group, your trusted toilet seat manufacturer since 2009, will walk you through the professional toilet seat installation process step-by-step. We'll also cover essential maintenance tips to prolong the life of your toilet seats and maintain a high standard of cleanliness. Whether you're a facilities manager, a contractor, or a homeowner, this toilet seat installation guide will equip you with the knowledge you need for a flawless finish.
At Jell Group, we understand the importance of quality and durability. Our extensive range of toilet seats, including MDF, UF, and PP options, are designed for easy installation and long-term performance. With certifications like FSC, BSCI, TUV, CARB, and CE, and strategically located EU warehouses in Germany and Poland, we are committed to providing superior products and seamless service to our B2B clients across Europe, the Middle East, and the Americas. This guide will not only help you understand how to install toilet seat fittings correctly but also how to care for them.
I. Understanding Your Toilet Seat Components
Before diving into the installation, it's essential to familiarize yourself with the typical components of a toilet seat. While designs may vary slightly, most modern toilet seats consist of:
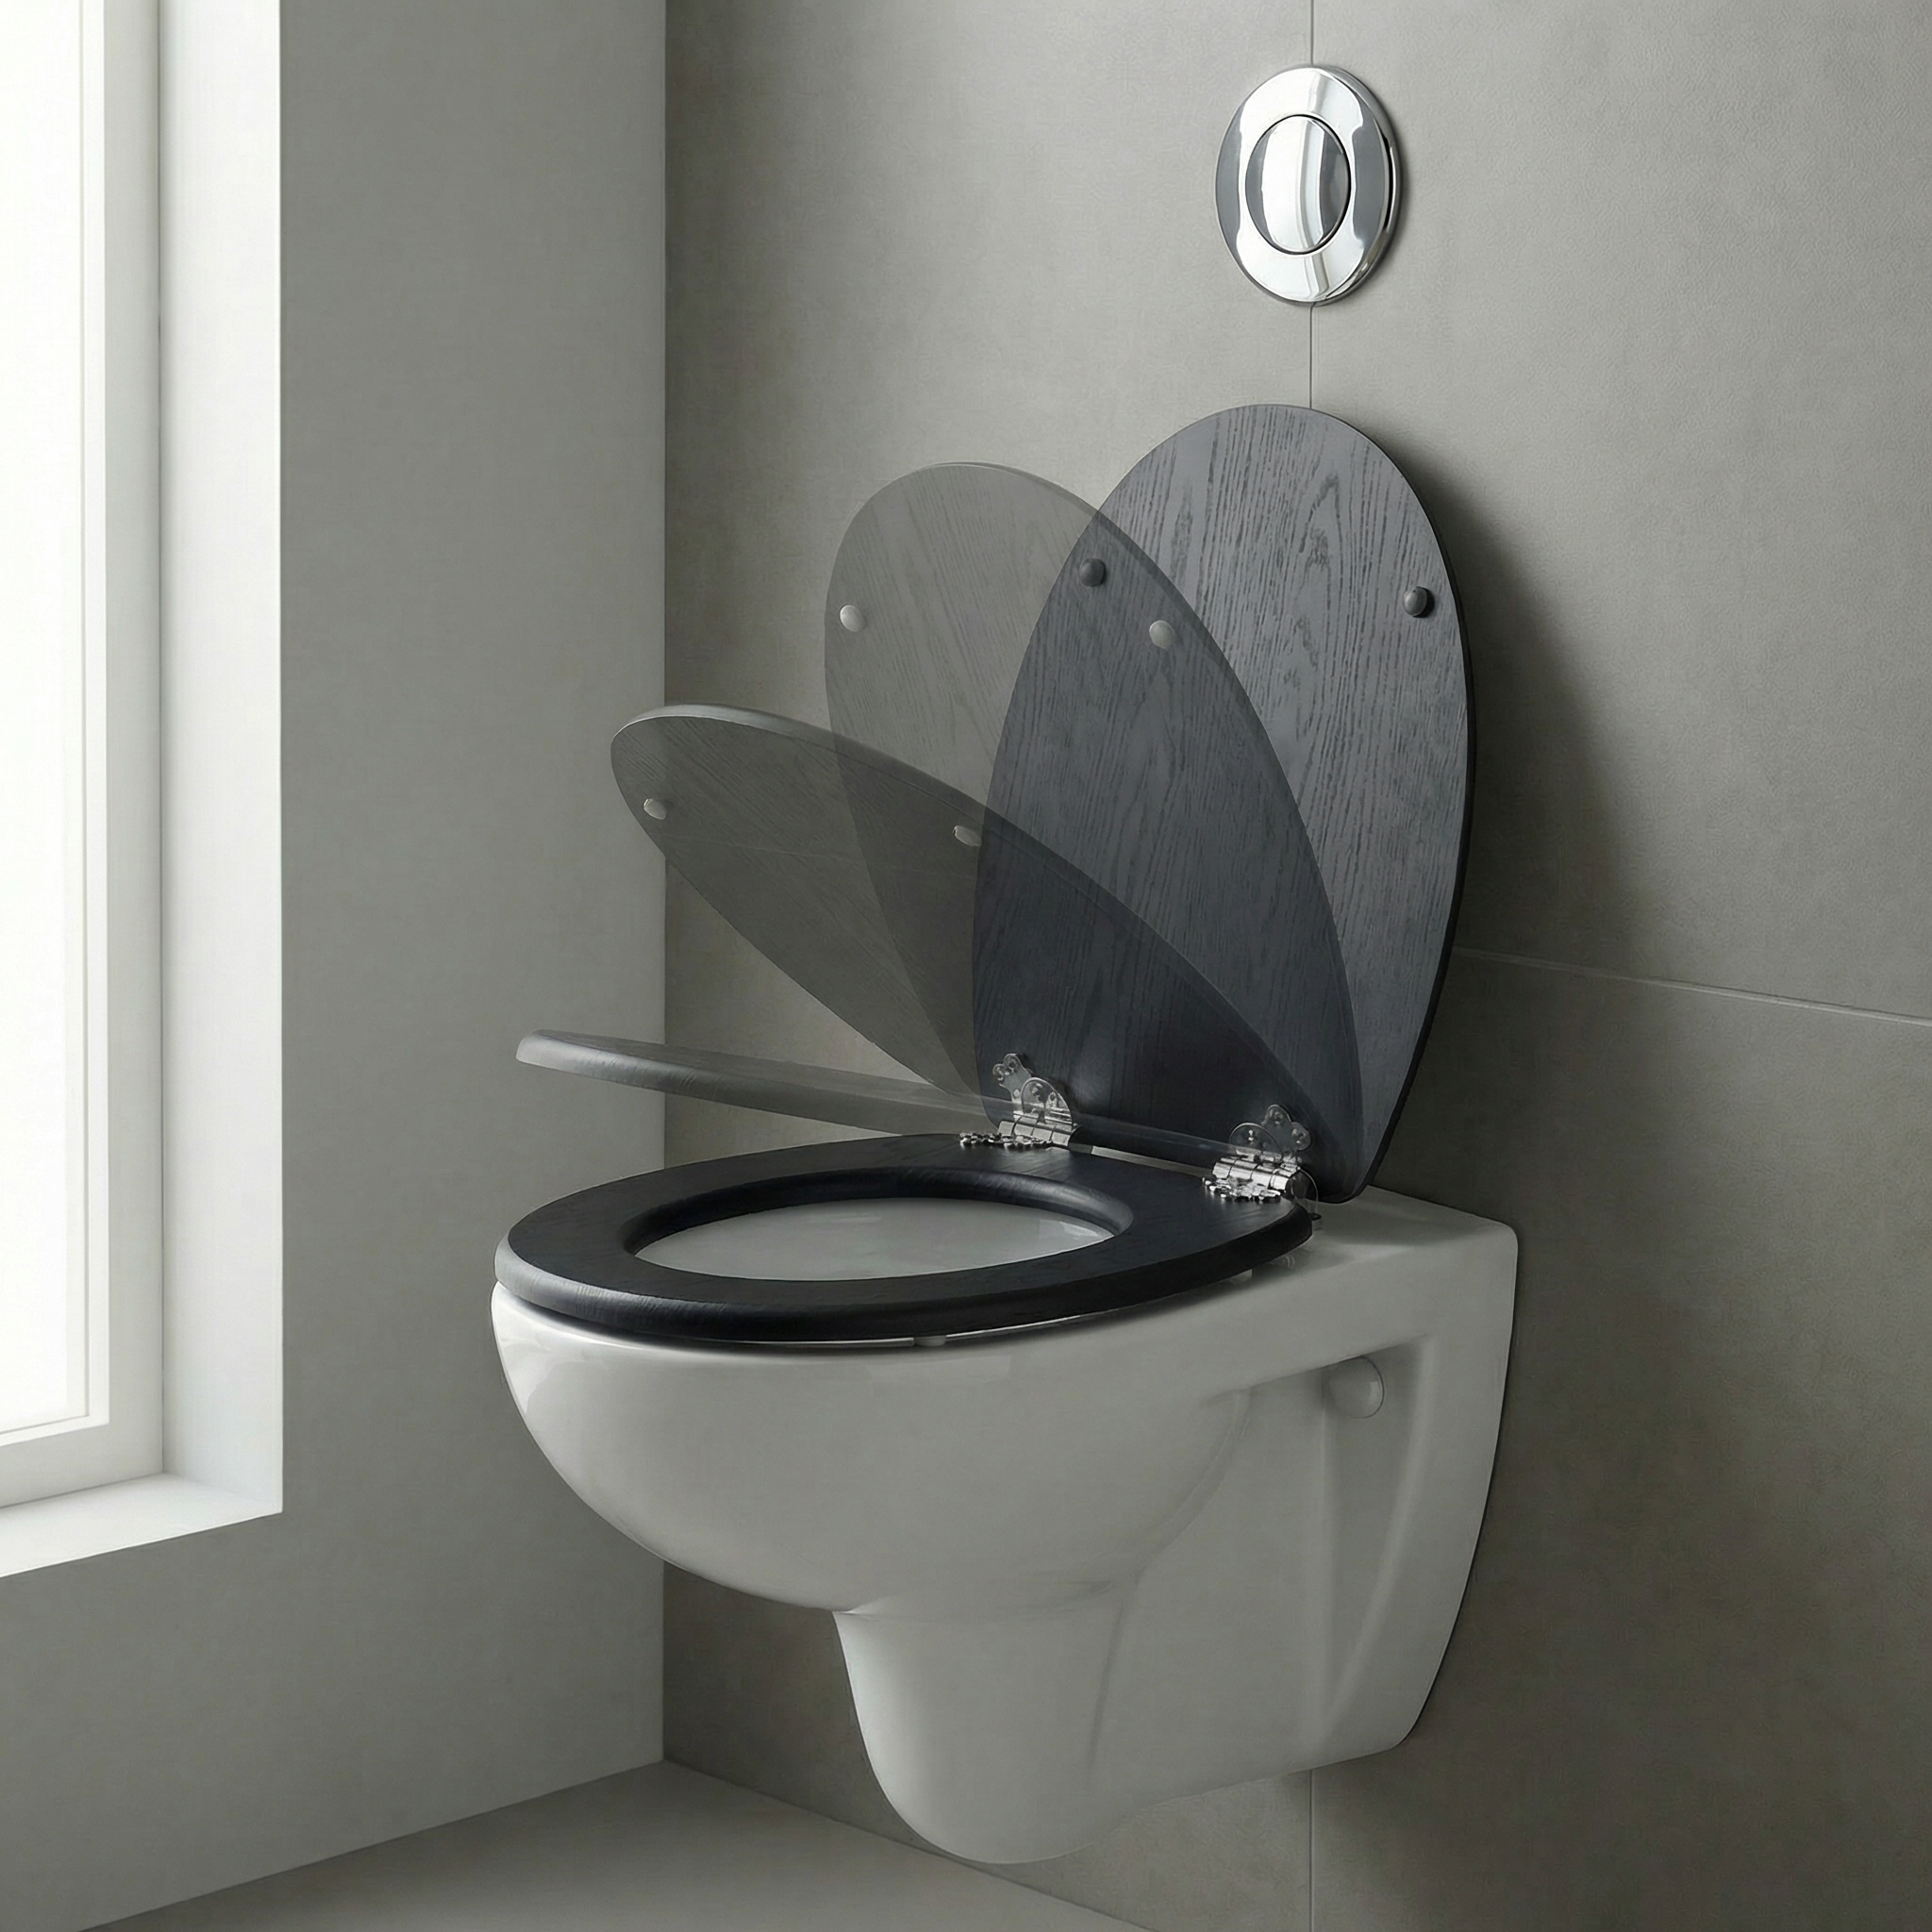
- The Seat and Lid: This is the main part you sit on and the cover.
- Hinges: These are the mechanisms that attach the seat and lid to the toilet bowl. They can be made of plastic or metal.
- Fixings (Bolts and Nuts): These secure the hinges to the toilet bowl. They are usually made of plastic or metal and come with rubber or plastic washers.
- Buffers/Pads: Small rubber or plastic feet that rest on the toilet bowl rim, providing stability and preventing scratches.
Jell Group offers a diverse product range, including innovative soft-close mechanisms and quick-release features that simplify both installation and cleaning. Understanding these parts ensures you can identify them and use them correctly during the installation.
II. Tools and Materials Needed for Toilet Seat Installation
Gathering the right tools beforehand will make the installation process smoother and more efficient. Here’s a checklist:
- Screwdriver: Usually a Phillips head screwdriver is required.
- Adjustable Wrench or Pliers: For tightening nuts, especially if they are metal.
- Measuring Tape: To ensure the new seat is the correct size if you're replacing an old one.
- Gloves: For hygiene.
- Cleaning Supplies: Disinfectant spray and cloths for cleaning the toilet bowl area before installation.
- New Toilet Seat: Ensure it's compatible with your toilet bowl shape (round or elongated) and size. Jell Group's range covers standard and specialized dimensions.
III. Step-by-Step Professional Toilet Seat Installation Guide
This section details how to install toilet seat fittings correctly. We'll assume you are replacing an old seat. If installing a new toilet, the process is similar for the seat attachment.
Step 1: Remove the Old Toilet Seat
Locate the hinges of the existing toilet seat. Most seats have bolts that go through holes in the back of the toilet bowl. You’ll typically find covers over the hinge bases; gently pry these open with a screwdriver.
- For plastic nuts: You might be able to unscrew them by hand from underneath the bowl. If not, use pliers or an adjustable wrench.
- For metal nuts: Use an adjustable wrench or pliers to loosen and remove them.
- For concealed fixings: Some modern seats have concealed bolts. Look for a button or lever on the hinge that allows the seat to be detached, or a cover that slides off to reveal the bolt.
Once the nuts are removed, lift the old seat and lid assembly away from the bowl.
Step 2: Clean the Toilet Bowl Area
This is a critical step for hygiene and ensuring a clean surface for the new seat. Thoroughly clean the area around the bolt holes on the toilet bowl. Use a disinfectant spray and a cloth to remove any grime, mineral deposits, or bacteria.
Step 3: Prepare the New Toilet Seat
Unpack your new toilet seat, usually from Jell Group, and identify all the components: the seat, lid, hinges, bolts, nuts, and any washers or buffers.
- Check hinge orientation: Ensure the hinges are correctly positioned for attachment to the bowl. Some hinges are designed to swivel or adjust.
- Insert bolts: If the bolts are separate, insert them through the hinges.
Step 4: Position the New Toilet Seat
Carefully place the new seat and hinges onto the toilet bowl, aligning the hinge posts or bolts with the holes in the back of the bowl. Make sure the seat is centered and sits evenly.
- For standard bolt fixings: Guide the bolts through the holes in the toilet bowl.
- For top-fixing hinges: These are designed to be installed from the top, which is ideal for toilets with difficult-to-access undersides. Follow the manufacturer's instructions, which usually involve inserting a rubber plug from above and then screwing in the bolt.
Step 5: Secure the Toilet Seat
This is where you'll tighten the fixings to ensure the seat is stable. Work from underneath the toilet bowl.
- Attach nuts: Screw the nuts onto the bolts. If your seat came with washers, place them between the bolt head/hinge and the toilet bowl, or between the nut and the underside of the toilet bowl, as indicated in the instructions.
- Tighten gradually: Tighten the nuts using your adjustable wrench or pliers. Do not overtighten, as this can crack the ceramic of the toilet bowl or damage the plastic fixings. Tighten them enough so the seat doesn't wobble, but still allows for slight adjustment.
- Check alignment: With the nuts slightly tightened, close the lid and seat. Check that the seat is centered and aligned with the bowl. Adjust its position as needed.
- Final tightening: Once aligned, fully tighten the nuts. Ensure the seat is firm and does not move when you apply pressure.
Step 6: Attach Buffers and Test
Most seats come with small rubber or plastic buffers that attach to the underside of the seat or the lid. These prevent the seat from banging against the bowl and provide stability. Apply these according to the instructions.
Finally, test the stability of the installed toilet seat. Gently push and pull on it to ensure there's no excessive wobble. Open and close the lid and seat to check the smooth operation of the hinges.
IV. Montage WC-Sitz: Special Considerations
For our German-speaking partners and clients, the term 'Montage WC-Sitz' refers to toilet seat installation. The principles remain the same, but it's worth highlighting features that simplify this process, which are often found in Jell Group's product lines:
- Quick-Release Mechanisms: Many Jell Group seats feature a quick-release function. This allows you to detach the seat entirely with the press of a button, providing unobstructed access to the hinge area and the back of the toilet bowl for thorough cleaning. This significantly simplifies both installation and maintenance.
- Top-Fixing Systems: As mentioned earlier, top-fixing hinges are invaluable for toilets with limited access from below. They are installed from the top of the cistern, making the process much easier and faster, particularly in tight spaces.
- Soft-Close Hinges: While not directly related to installation difficulty, soft-close hinges ensure the seat and lid close gently, preventing slamming and reducing wear and tear. This contributes to the longevity of the product.
When ordering, especially if you are a B2B client in Germany or require instructions in German, please specify your needs. Jell Group is equipped to provide comprehensive support for your 'Montage WC-Sitz' requirements.
V. Professional Toilet Seat Maintenance Guide
Proper maintenance is key to ensuring the longevity, hygiene, and aesthetic appeal of your toilet seats. Here are essential maintenance tips for various materials:
A. General Cleaning Practices (Applicable to MDF, UF, and PP seats)
Regular cleaning prevents the buildup of bacteria and maintains the seat's appearance. The frequency of cleaning will depend on the usage level of the facility.
- Daily Cleaning: For high-traffic areas, a quick wipe-down with a damp cloth and mild disinfectant is recommended.
- Weekly Deep Cleaning: Use a mild, non-abrasive cleaner. Spray the cleaner onto a soft cloth, not directly onto the seat, especially if it's an MDF seat, to prevent moisture damage. Wipe down the seat, lid, hinges, and the underside.
- Avoid Harsh Chemicals: Never use abrasive cleaners, scouring pads, bleach, or solvents. These can damage the surface finish, fade the color, or even degrade the material over time.
B. Material-Specific Maintenance Tips
While general cleaning is important, understanding the specific needs of each material can optimize care.
| Material | Key Maintenance Considerations | Recommended Cleaning Agents | Things to Avoid |
|---|---|---|---|
| MDF (Medium-Density Fibreboard) | MDF is susceptible to moisture damage if the protective coating is compromised. Ensure all edges and surfaces are sealed. Avoid prolonged exposure to water. | Mild soap and water, non-abrasive bathroom cleaners. Always dry thoroughly. | Harsh chemicals, abrasive cleaners, prolonged wetness, bleach, solvents. |
| UF (Urea-Formaldehyde) | UF seats are highly durable and resistant to scratches and stains. They are less susceptible to moisture than MDF but still require careful cleaning. | Mild soap and water, non-abrasive bathroom cleaners. Can usually tolerate a slightly stronger disinfectant than MDF, but always test in an inconspicuous area. | Abrasive cleaners, scouring pads, solvents. |
| PP (Polypropylene) | PP seats are lightweight, durable, and generally the most budget-friendly. They are resistant to most common cleaning agents. | Mild soap and water, most household disinfectants (follow product instructions). | Extremely harsh chemicals or solvents might degrade the plastic over long-term exposure. |
C. Maintaining Hinges and Fixings
The hinges and fixings are vital for the seat's stability and function. Regularly check that they are clean and secure.
- Clean Hinges: Use a small brush (like an old toothbrush) to clean dirt and grime from around the hinges. For quick-release seats, detach the seat periodically for thorough cleaning of the hinge area.
- Check Tightness: Periodically (e.g., monthly), check that the nuts securing the seat are still tight. Gently try to wobble the seat; if it moves, tighten the nuts slightly as described in the installation section.
- Lubrication: For some metal hinges, a tiny drop of silicone-based lubricant might help maintain smooth operation, but this is rarely necessary for modern seats, especially those with plastic components. Avoid oil-based lubricants which can attract dust.
D. Addressing Stains and Scratches
- Stains: For stubborn stains on UF or PP seats, a paste of baking soda and water can sometimes lift them. Apply, let sit for a short while, then gently wipe away. For MDF seats, be very cautious with moisture and avoid abrasive treatments that could damage the finish.
- Scratches: Minor scratches on PP seats are common and usually superficial. Deeper scratches on MDF or UF seats can compromise the protective layer. For significant damage, replacement might be the best option to prevent further deterioration and maintain hygiene.
VI. When to Replace Your Toilet Seat
Even with proper maintenance, toilet seats have a lifespan. Consider replacement if:
- The seat is cracked, chipped, or has deep scratches.
- The hinges are loose and cannot be tightened, or are corroded.
- The seat is stained or discolored and cannot be cleaned effectively.
- The material has degraded, becoming brittle or warped.
- Hygiene is compromised due to damage.
Jell Group offers a wide selection of replacement toilet seats in various materials and styles, ensuring you can find a durable and aesthetically pleasing option to fit your needs and budget. Our commitment to quality means our seats are designed to last, providing excellent value for our B2B partners.
VII. Jell Group: Your Partner for Quality Toilet Seats
Since 2009, Jell Group has established itself as a leading toilet seat manufacturer in China, specializing in high-quality MDF, UF, and PP toilet seats. Our dedication to excellence is reflected in our comprehensive certifications (FSC, BSCI, TUV, CARB, CE) and our robust supply chain, including strategically located EU warehouses in Germany and Poland. This allows us to efficiently serve clients across Europe, the Middle East, and the Americas.
We offer both OEM and ODM services, meaning we can manufacture products to your exact specifications or develop innovative solutions tailored to your market. Our expertise in toilet seat manufacturing ensures that every product we deliver meets the highest standards of quality, durability, and design. Whether you require standard, soft-close, quick-release, or specialized toilet seats, Jell Group is your reliable partner.
Understanding professional toilet seat installation and maintenance is key to customer satisfaction and product longevity. We are proud to provide resources like this guide to support our clients. For any inquiries about our products, or to discuss your specific OEM/ODM needs, please do not hesitate to contact us.
Frequently Asked Questions (FAQ)
Q1: How do I know if I need a round or elongated toilet seat?
The easiest way to determine this is by measuring your current toilet seat. Elongated seats are typically about 18.5 inches (47 cm) from the center of the bolt holes to the front edge, while round seats are usually around 16.5 inches (42 cm). Visually, elongated seats are longer and more oval-shaped, while round seats are more circular. Jell Group offers both types to fit most standard toilets.
Q2: Can I use bleach to clean my toilet seat?
It is generally not recommended to use bleach, especially on MDF and some UF seats, as it can damage the finish, cause discoloration, and degrade the material over time. For PP seats, while more resistant, it's still best to opt for milder disinfectants to preserve the material's integrity. Always refer to the manufacturer's cleaning instructions and use bleach sparingly and diluted if absolutely necessary, testing in an inconspicuous area first.
Q3: My new toilet seat wobbles after installation. What should I do?
A wobbly toilet seat usually means the fixings are not tight enough. Revisit Step 5 of the installation guide. From underneath the toilet bowl, tighten the nuts on the bolts. Be careful not to overtighten, as this can damage the toilet or the seat fixings. Ensure the seat is correctly aligned before the final tightening. If the wobble persists, check if the hinges themselves are loose or if the toilet bowl holes are unusually large.
Q4: What is the difference between MDF, UF, and PP toilet seats?
MDF (Medium-Density Fibreboard) seats are typically painted and offer a smooth, often luxurious feel, but are susceptible to moisture damage if the finish is compromised. UF (Urea-Formaldehyde) seats are a thermosetting plastic, known for their durability, scratch resistance, and resistance to stains and chemicals. They offer a good balance of quality and price. PP (Polypropylene) seats are lightweight, very durable, and generally the most cost-effective option, offering good resistance to everyday wear and tear.
At Jell Group, we manufacture all three types, catering to diverse market needs and price points. Our commitment to quality ensures that each material is processed to maximize its benefits and longevity.
Conclusion
Mastering the professional toilet seat installation and maintenance is a straightforward process when you have the right guidance. By following these steps, you can ensure a secure, hygienic, and long-lasting toilet seat. Jell Group is proud to be your trusted partner in providing high-quality toilet seats that meet international standards. Our extensive experience, commitment to innovation, and customer-centric approach make us the ideal choice for your business needs. Explore our product range and let us help you find the perfect toilet seat solutions.
blog.relatedArticles
Launch Your Private Label Toilet Seat Brand with Jell Group
Discover how to successfully launch your own private label toilet seat brand. Learn about market opportunities, product selection, manufacturing partnerships, branding, and distribution strategies. Jell Group offers expert OEM/ODM solutions for a seamless launch.
Toilet Seat Warranties: Your Guide to Quality Guarantees
Navigate toilet seat warranties with confidence. Understand common terms, what's covered, and how Jell Group's commitment to quality ensures lasting value for your business. Essential knowledge for B2B buyers seeking reliable bathroom fixtures.
Wholesale Toilet Seat Procurement from China: Your Ultimate Guide
Navigating the landscape of wholesale toilet seat procurement from China can be daunting. This guide offers expert insights for B2B buyers, covering supplier selection, quality control, logistics, and leveraging Jell Group's expertise for your bulk purchase needs.

MDF Toilet Seats: The Ultimate B2B Buying Guide
Discover the advantages of MDF toilet seats for your business. This comprehensive guide covers material benefits, durability, aesthetics, and key considerations for B2B buyers seeking quality and value from a trusted manufacturer like Jell Group.